FreeRTOS tutorial on STM32
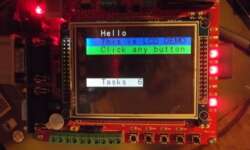
A High-density line of STM32 microcontrollers has quite many features that can be used in your programs. However, the more features you add to the source, the more complicated the program becomes, and it may become challenging to keep up with all things. Relying on the main loop and interrupts becomes a time-consuming task to manage. If you do not want to struggle while tuning things up manually, you can use one of the best free real-time operating systems (RTOS). It is handy when you need many separate functions to run in parallel without missing a task. RTOS scheduler takes care of giving each task a required period to perform. There are many great RTOS systems around. Many of them are free and open source. Follow the FreeRTOS tutorial to see how easy it is to run complex tasks. I love using FreeRTOS, which has a long successful history and is flexible to fit multiple hardware types. You can check out my demo FreeRTOS tutorial on Atmega128. I also encourage you to give it a try for other RTOS systems like ChibiOS, BeRTOS, and others. FreeRTOS is quite simple and easy to use. It has practically all of the features…

Continue reading

Flashing programs to STM32. Embedded Bootloader

Post updated with new screens and up-to-date information (2020)! There have been several requests from users to explain more about loading programs into the flash memory of STM32 microcontrollers. There are several ways how to perform stm32 flash programming. You may enter the STM32 bootloader directly via USART interface and upload the binaries. The more advanced and flexible method is to use an ST-LINK utility – an ST-based adapter, which connects to STM32 board through JTAG interface. Many ST development boards already have this feature included. Otherwise, you can jump-wires from one to another, or get a dedicated portable ST-Link adapter. Also, you can use standard third-party JTAG tools such as J-Link. Finally, you can flash your bootloader that works with any interface (USART, USB, SPI, etc.) The STM32F103RB board Any of these methods are great if they get the job done. In this topic, let us focus on how to perform STM32 flashing by using a bootloader. Today probably, no manufacturer is producing boards with an RS232 interface. Nevertheless, you like me, probably have a dozen older boards with a serial port. They are great boards still to use in many projects.

Continue reading

Setting up CoIDE with GNU tools

For some time, I’ve been using Codebench ARM GCC tools for developing software for ARM microcontrollers. As IDE, I used plain Eclipse, which I had to configure by myself. It worked pretty well, and there is nothing wrong with this. Anyway, sometimes it gets a little annoying to keep an eye on configurations and manual settings. So I decided to give a try CooCox IDE which claims to be free and open. It seems that it already supports all the microcontrollers I like to use. Along with this change, I am also moving to a different GCC tool collection. Codebench free tools are great, but on the other hand, there are some limitations. One of them is release times. They release their free tools twice a year, so updates and other improvements cannot reach as fast as you’d expect.Another thing I am concerned – disabled hard float functionality. If you would like to ta take advantage of the floating-point unit in Cortex-M4, then you get stuck. If you are not using a hardware floating-point module, this tool works fine, and you can stick with it. Anyway, I wouldn’t say I like limitations, especially with free tools, so I switch to…

Continue reading

Bit Band operations with ARM Cortex microcontrollers

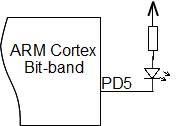
I got few questions from our readers about the bit-band feature in ARM Cortex microcontrollers. It may seem to be a prominent topic, still may lead to come confusion while using bit-banding. So let’s look at this feature a little bit closer. Why use bit band? Simply speaking Bit banding method allows performing atomic bitwise operations to memory areas. Why use bit banding? The most straightforward answer is because ARM Cortex doesn’t have something like BIT CSET or BIT CLEAR commands like most of the 8-bit microcontrollers do. So this is somewhat a workaround solution. Another question may rise – Why not using the read-modify-write method? Again this method is not reliable in some cases. For instance, f there is an interrupt during this operation; it can cause data corruption. Other situation may occur in embedded OS when different tasks may modify the same memory location. So we want a method that allows setting or clear individual bits with a single instruction. This is where the bit band method helps.

Continue reading

Setting up Tiva C Launchpad project template with Sourcery Codebench and Eclipse

Tiva C series TM4C123G (MCU:TM4C1233H6PM)Launchpad is updated version of Stellaris Launchpad LM4F120 (MCU: LM4F120H5QR). Practically this is due to TI’s choice to change the name of the product line. Such action led to some confusion, especially for software developers. This means that software libraries had to be renamed, software tools adapted, and so on. Since this work is most renaming things from one point, this is an easy task; from another point, it may be tricky to check all corners. So if you just into Texas Instruments ARM Cortex microcontrollers, it is better to start with the Tiva C series and forget Stellaris. Otherwise, this might get confusing to switch from one to another. At the moment, TivaWare 1.1 still has some issues due to migration, but most things should work fine. Let’s try to create a project template for Eclipse IDE and Sourcery Codebench Lite GCC compiler tools. First, you need to download and install Eclipse with CDT C/C++ tools (Eclipse Indigo includes this). Next, you need to install the latest Mentor Sourcery Codebench Lite. Also, download and extract TivaWare for the C series, where all libraries and examples are located. To Flash microcontroller, download LM Flash Programmer. Other…

Continue reading

How to calibrate touch screen display on STM32 board

stm32_touch_screen_interface

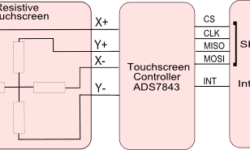
Touch screen displays are a common choice in many microcontroller projects. Touch capability won’t take additional space – it sits on top of LCD to directly interact with objects you see on screen. To get this working, touch screen coordinates must match screen coordinates. So could be sure when you touch the point on screen you point where you want. The touch screen is an analog device. It is made of two flexible resistive sheets with a gap between them. When the screen is touched, a connection between sheets is made, and thus a measurement of voltage drop is taken. Normally resistive touch screen has a four-wire configuration. And normally, a specialized IC is used to take measurements and send data to MCU for processing. In our case, we are dealing with the ADS7843 touch screen controller, but in other systems, this works the pretty the same way. The fact is that the touch screen controller reads screen ADC values and passes them via the SPI interface. So all you get is raw ADC readings that are not lined up with LCD coordinates. As you know, LCD screens can be of different resolutions, different orientations, so data gathered from resistive…

Continue reading

Project demo on STM32F103RBT6 using GCC

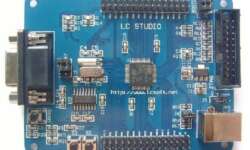
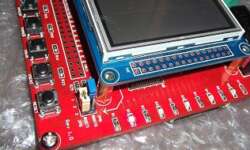
STM32F103R board is a simple and easy development board to learn STM32 microcontroller programming. Its heart is an STM32F103RBT6 ARM Cortex-M3 microcontroller with 128K of Flash and 20K of SRAM memory. It can be clocked at the maximum 72MHz frequency and considered a medium-density performance line microcontroller. Other features include USB, CAN, seven timers, 2ADCs, and nine communication interfaces. The Development board has several excellent features to get started. First of all, it has an RS232 interface for communicating and accessing the bootloader. There also is a USB 2.0 full-speed interface connector that also can work as the power supply. Next is a JTAG connector to program microcontroller using tools like a J-Link adapter. Two pushbuttons and two programmable LEDs are hardwired to MCU pins alongside all I/Os connectors.

Continue reading

Driving Graphical LCD with STM32F103ZET6

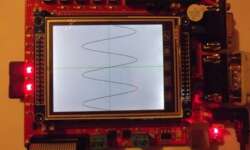
STM32F103ZET6 board comes with 3.2 inches graphical LCD which features an ILI9320 controller. Equipped LCD is capable of displaying 252144 colors when driven in 18-bit mode. We are going to run it in 16-bit mode, so we are limiting it to 65K colors. LCD driver is based on the existing code found on the internet, originally developed for the STM3210E board. Only minor modifications were needed, like assigning the proper control pins.

Continue reading

Connecting STM32 USART to standard I/O streams in GCC

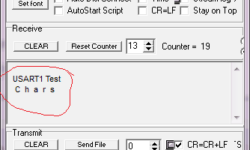
In many situations, when working with STM32 microcontrollers, you will want to output text strings. There is no need to write specialized functions that output specially formatted strings as it is hard to keep up with various cases. It is convenient to use standard I/O streams and their library functions that allow sending formatted data streams. Arm GCC toolchain comes with the newlib C library from Redhat, so it isn’t specially designed for the embedded toolchain. To use stdio functions, we have to take care of several syscals so-called “stub functions.” These functions usually are provided by operating systems like you would write C programs in Windows or Linux. In our case, we aren’t using any OS, so to avoid error messages while compiling, we have to provide these function declarations where most of them are dummy implementations. It’s not something new pick one that you find on the internet. I noticed that it was written for STM32 Discovery. I named it newlib_stubs.c and placed it in the startup directory. Among system functions implementations like _write(), _fstat(), etc., there are also USARTs assigned to standard streams:

Continue reading

Interrupt based button read on STM32F103ZET6 board

In the previous example, we implemented a simple demo program that reads buttons by continually checking their status in the main program loop. This isn’t an efficient and convenient way to do that. Imagine your application has to do lots of tasks, and in between, you also need to check button status – mission becomes impossible unless you use interrupts. In this part, we briefly introduce to STM32F10x interrupt system and write example code where LEDs and buttons are serviced within interrupts. ARM Cortex-M3 microcontrollers have an advanced interrupt system that is pretty easily manageable. All interrupts are controlled inside Nested Vectored Interrupt Controller (NVIC), close to the Cortex core, to ensure low latency and robust performance. Main features of NVIC include:

Continue reading