Setup AVR Eclipse plugin to work with WinAVR
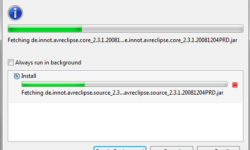
Probably many of you (including me) are using Programmers Notepad or AVR Studio to set up AVR projects. Each of them has advantages and disadvantages. For instance, Programmers, Notepad is a great GUI, but there are many manual routines required to start compiling projects – like setting up makefile, creating file dependencies, etc. AVR Studio is a great solution that generates makefiles automatically, and it has a great simulator for immediate debugging. So why would we need another IDE? Actually, Eclipse IDE is one of the best open-source tools that programmers widely use – so it is optimized for managing projects, code writing with auto-complete functionality. So why not give it a try. So let’s set up an Eclipse environment to work with AVR. First of all, let’s download Eclipse from https://www.eclipse.org/downloads/ site. Choose Eclipse IDE for C/C++ Developers as we want to program AVR in C. Open it (no need to install), then go to HELP->Install New Software… Click Add… and in the Add Site dialogue box, enter the URL where the AVR Eclipse plugin is located (https://avr-eclipse.sourceforge.net/updatesite/ )