One of the more advanced PCB manufacturing methods is exposing laminate copper boards covered by a photo resistive layer through the mask. Using UV light in manufacturing PCB’s has many benefits according to other methods: you can get thin tracks like 0.2mm. You couldn’t do this using other home techniques like laser printers or hand artwork; another advantage is that this method gives a clean image – smooth edges of PCB tracks. Little bit effort and you can compare results to commercial products. And of course, the third benefit is speed and multiple replications of your boards by using the same mask. This article is described in the manufacturing of an automatic ultraviolet light source exposure box.
Parts for UV box
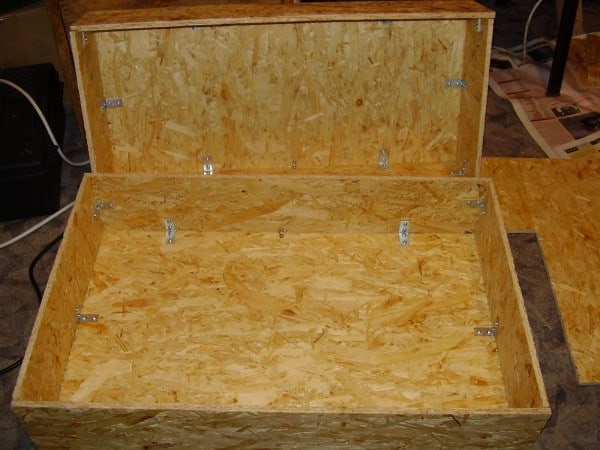
Case with organic glass
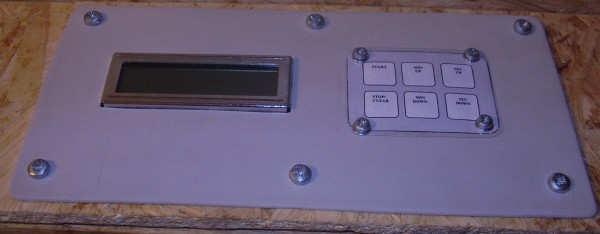
Panel
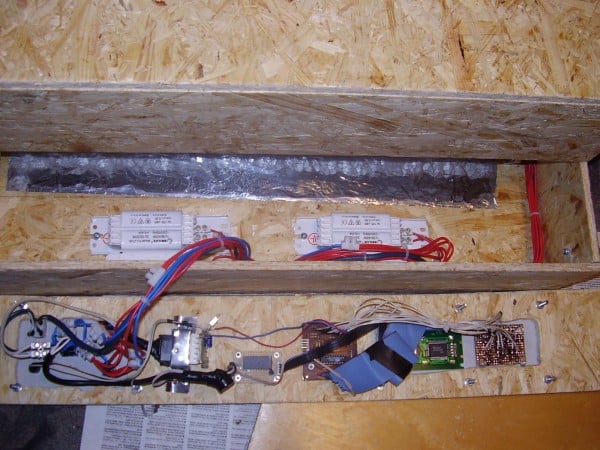
UV lamps ballasts and starters
Controller

Case
Case is made of 5mm wood board wired with screws.

Making a control panel
The Control panel consists of two parts: Power control and Automatic control.
A POWER switch is used to turn the on/off the power of the UV box. Green LED indicates the ON. MANUAL/AUTOMATIC switch is used to power l the UV lamps manually or automatically. Switches UPSIDE and UNDERSIDE are used to enable upper and lower lamps separately if you are using single or double-sided boards.

When automatic mode is selected, by pressing buttons MIN UP, MIN DOWN, SEC UP, SEC DOWN, exposure time is selected. START Starts the timer counter and powers the lamps through relays. STOP/CLEAR is not implemented yet. Time of exposure, after the start is pressed, LCD shows the remaining time of UV exposure.

UV Lamps

There are used 8 PHILIPS TL 20W/52 lamps in this exposure box on each side. Some technical characteristics:
| Wavelength, nm | 450 |
| Power, W | 20 |
| Voltage, V | 57 |
| Current, A | 0,37 |
| Cap | G13 |
| A, mm | 589,8 |
| B, mm | 596,9 |
| C, mm | 604 |
| D, mm | 38 |

All view of lamps installed.

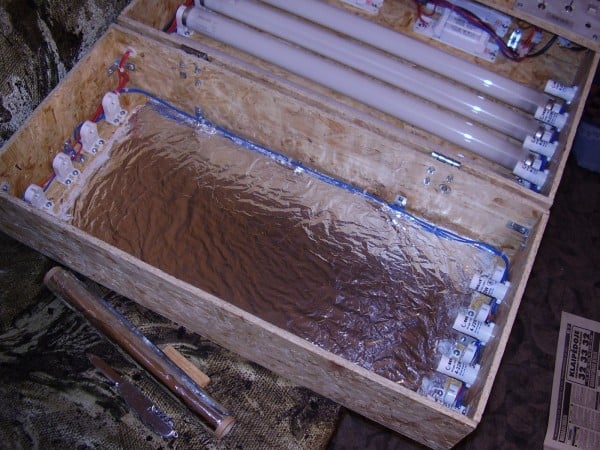
To make all the float of light towards the PCB, there is Aluminum foil used. It also makes illuminations smoother.


The intensity smoothness is viewed on the white paper sheet at a distance of 5 cm from lamps.
Controller
The UV box is controlled by an 8-bit microcontroller AT90s2313 from ATMEL. Circuit diagram is shown bellow:

The control circuit is elementary. Buttons are connected directly to I/O pins through internal Pull-Up resistors. When the button is pressed – the “0†level in port input is generated, which triggers an action.
Buttons MIN UP, MIN DOWN, SEC UP, SEC DOWN are used to select UV exposure Time. START is for starting Exposure and count down. LCDs time remaining.
There are standard HD44780U LCD 6×2 characters used. Lamps are controlled through 5V relays.
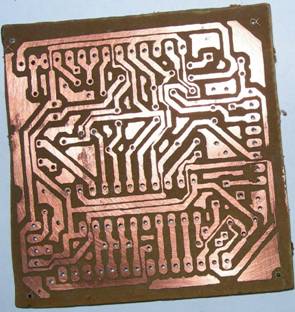
There you can see some Pictures of PCB.

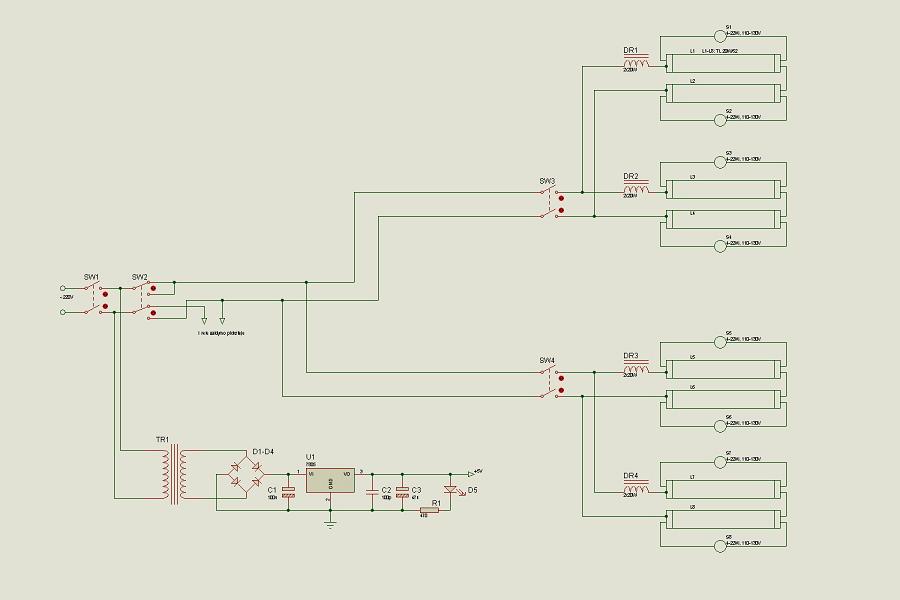
Lamp control and power source
UV lamps are connected in series of 2, and then ballasts are connected. The starter is connected to lamps in parallel. The Upper and lower covers of the box can be controlled separately by using a switch. In this circuit, you can also see power control for the microcontroller and relays.
Putting it all together

First test


Other examples you can see in my ARM section.
Download source code: Source Code


You can find source code link at the bottom of my article. Here is direct link :
https://scienceprog.com/wp-content/uploads/2006/04/2313LCD_V1.1.0.1.ZIP
Which program to compile asm file into hex file are you using?
Im using BASCOM but the program detect a syntax error. Error in line 1781 and 1782 and its impossible to continue with compilation. Could you send me the compiled file? Or help me how to solve this problem. I need to program the AT90S2313 to finish UVBOX.
Hex file is already in archive. Download it and burn.
Program is written in C language. This one is written by using Codevision C compiler. You can download demo from http://www.hpinfotech.ro/. It will be enough for this program. Bascom is Basic language compiler, which is not the same as C.
Do you know any DIY programmer to use with Codevision ? I built a programmer to burn AT90s2313 from Elektor 2003 July/August edition and it works with BASCOM and Sample Electronics Programmer and try to burn through hex file and nothing happenned using LPT port. 🙁
All parts of UVBOX are ready except the main (lol). I need to burn this chip. What about PonyProg? Do you know any easy to build with minimal parts circuit that works with PonyProg??
To make programmer for Codevision it would bu tricky one I think. You can find my DIY programmer for LPT working with PonyProg in this site: AVR ISP This requires only few parts and works like a baby for me.
Finally I programmed the AT90S2313 and tested the circuit but nothing happens, only one line from 16×2 LCD appears but without none character. Please Could you verify my board and my conections if I send you photos? I used ICPROG v.105 and the programmer from this page
http://www.serasidis.gr/circuits/avrprog/avrprog.htm
Okay!
Its working perfectly now I need translate to english some words that appears on the LCD screen. I just correct the connections that was wrong on the LCD and work fine. What’s language in that??
Could you tell me the meaning in english of those words?
Good to hear that 😉
Hi, this is a great project for a (not so) starter like me but the schematics are so tiny that can’t be readed, can you post larger ones?
Just press right mouse button and select “Save Image As” – then you download bigger images. Sorry for this inconvenience.
you thanks
can u send me via e-mail the hex file but in english version, because i don’t understand with the language that appear on lcd. thanks…. or u can tell me what language it’s.
Source code have been translated to English language. Feel free to download it here:
https://scienceprog.com/wp-content/uploads/2006/04/2313LCD_V1.1.0.1.ZIP
The Source code link is dead…
Can anybody email me this archive please?
tolik212@gmail.com
Repaired source code link. Thank you for letting know this.
This is a great website.
I’ve been trying to edit the source code with the CodeVision program but keep getting a file to big for evaluation version error, so I try the unedited (original) source code and get the same error, is there something I’m doing wrong?
Also is it possible to get a higher quality photo of the light wiring as I’m finding it hard to read all the text on it.
Thanks!
gamingmaster2000@hotmail.com
Now this image works as a link. Click on it to see bigger image.
Well there may be a problem with compilation of source. Program was written for early version of CodeVision. Best solution would be to use full version or adapt source for different compiler like WinAVR.
Hello
I’m having a hard time finding the UV lights…
I found one also from Philips: TL 15W/10…
Do you think that it works also with this one?
Cheers
David
Of course they will. As they are less powerful, you’ll just have to increase exposure time.
o.k
Very good project congratulation.
I have design a pcb on Eagle format
what can, if uv lamp replace with normal lamp for use pcb exposure.
Congratulations!!!!!Excellent project!!
I build it and worked great.
Hope that there will be another firmware release with the STOP button working.
Thanks again.
PS:You can use as an alternative, SYLVANIA F15W/BL350 UV lamps.Chipper and easier to find
?????? ???????? ???? ???? ??? ??????
PLZ IN SITE TO LANGUECH (PERSIAN) CHANJED
I AM MEHRAN CHAMANI IN CONTRY IRAN
THANK YOU
Hello. I’m from Iran
Subjects did well in here.
But I do not speak much English, and did not fully understand what you wrote!
If you are sure this blog software, put the paper Tmaly Shmarv several languages, including Farsi () returned.
Batshkr of useful information in here that did.
http://www.MehranCHamani1@yahoo.com
I was made from this site uv box http://www.qubbeks.puslapiai.lt/readarticle.php?article_id=25 but it dont using UV LEDs. Exposing time are about only 6min.
Dear..
is different between neon usualy for room with for UV?
thanks
Hi.
Can you help me to make the stop/clear button work?
Thanks.
Hi, i am unsure on what qualities the UV bulbs need to be effective at PCB exposure, would sterilisation bulbs work? This is an example of one i would likely be using if they are: http://www.swallowaquatics.co.uk/43/products/16_Watt_UV_Light_Bulb_T5_288mm.aspx
thanks,
Where do you get or how do you make the mask?
Waht kind of glass u used it and thickness of glass and what is separation distance between glass and a bulb
The glass there is Plexiglas (organic), as regular glass filter out UV light. The distance between bulbs and glass is ~8cm. The distance is not that big deal. More important to get even light on PCB.