
This is a follow-up post from previous where we were calculating Naive Bayes prediction on the given data set. This time I want to demonstrate how all this can be implemented using the WEKA application.

I highly recommend visiting their website and getting the latest release. WEKA is a compelling machine learning software written in Java. It is a widely-used and highly regarded machine learning software that offers a range of powerful data mining and modeling tools. It provides a user-friendly interface, making it accessible to both experienced and novice users. Weka offers a wide range of algorithms and data pre-processing techniques, making it a flexible and robust tool for various machine learning applications, such as classification, clustering, and association rule mining.
You can find plenty of tutorials on youtube on how to get started with WEKA. So I won’t get into details. I’m sure you’ll be able to follow anyway.
Preparing data for classification
We will use the same data set as in the previous example with weather features, temperature and humidity, and class yes/no for playing golf.
Data is stored in arff file format specific for WEKA software and looks like this:
@relation 'weather.symbolic-weka.filters.unsupervised.attribute.Remove-R1,4'
@attribute temperature {hot,mild,cool}
@attribute humidity {high,normal}
@attribute play {yes,no}
@data
hot,high,no
hot,high,no
hot,high,yes
mild,high,yes
cool,normal,yes
cool,normal,no
cool,normal,yes
mild,high,no
cool,normal,yes
mild,normal,yes
mild,normal,yes
mild,high,yes
hot,normal,yes
mild,high,no
Here we can see the attribute denominators: temperature, humidity, and play, followed by the data table. Using this data set, we will train the Naive Bayes model and then apply it to new data with temperature cool and humidity high to see to which class it will be assigned.
First of all, in WEKA explorer Preprocess tab, we need to open our ARFF data file:
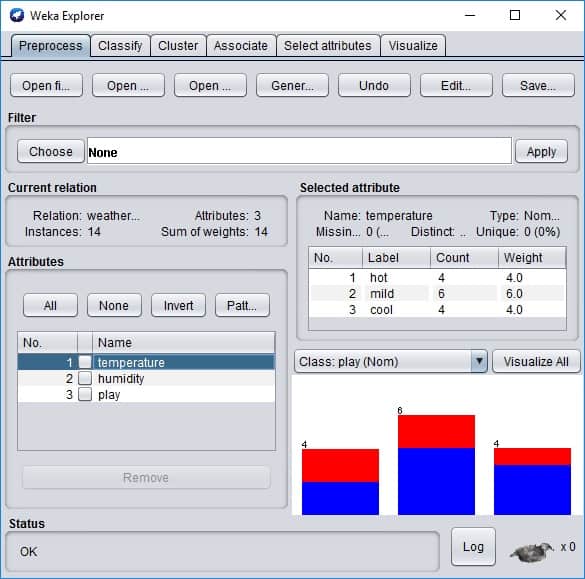
Here we can see the basic statistics of attributes. If you click the Edit button, the new Viewer window with the data table will be loaded.
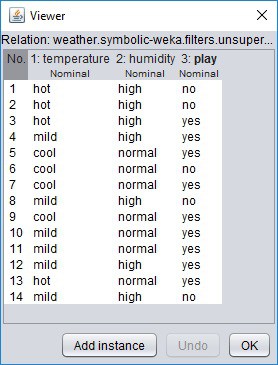
You can edit data as you like in the viewer, and then you can permanently save new data set with the Save button in explorer. We will do so when we create a test set with cool and high parameter values. For this, we delete all lines of data except the first one and edit values to look like this:
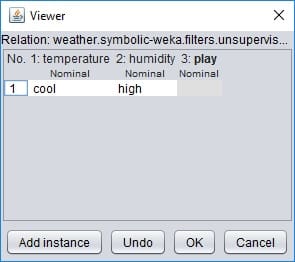
Select nothing on play attribute because we don’t know it yet.
Click OK and then Save data as a separate file. The file should look like this:
@relation 'weather.symbolic-weka.filters.unsupervised.attribute.Remove-R1,4'
@attribute temperature {hot,mild,cool}
@attribute humidity {high,normal}
@attribute play {yes,no}
@data
cool,high,?
The question “?” mark is a standard way of representing the missing values in WEKA.
Building a Naive Bayes model
Now that we have data prepared, we can proceed with building the model. Load complete weather data set again in explorer and then go to Classify tab.
Here you need to press the Choose Classifier button, and from the tree menu, select NaiveBayes. Be sure that the Play attribute is selected as a class selector, and then press the Start button to build a model.
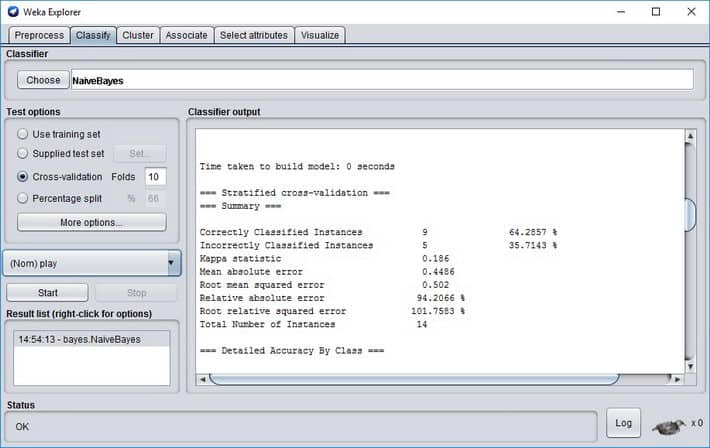
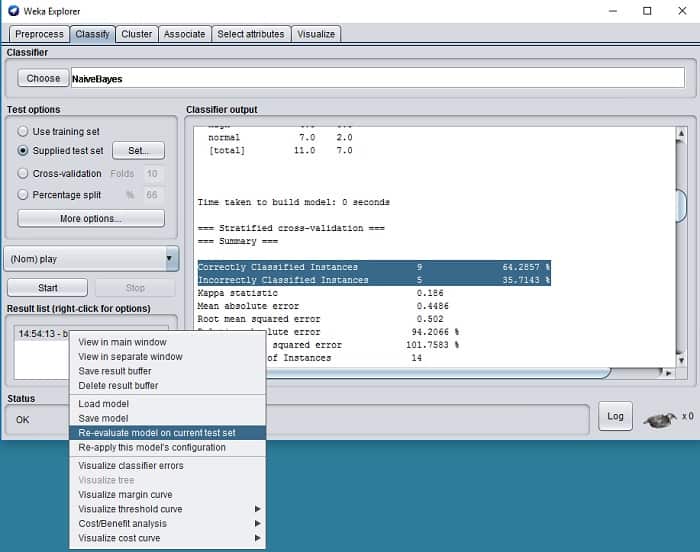
Model outputs some information on how accurate it classifies and other parameters.
Correctly Classified Instances 9 64.2857 %
Incorrectly Classified Instances 5 35.7143 %
You can see that on a given data set, the classifier’s accuracy is about 64%. So remember that you shouldn’t always take the results for granted. To get better results, you might want to try different classifiers or preprocess data even further. We won’t get into this right now. We need to demonstrate the usage of the model on new upcoming data.
Evaluating classifier with the test set
Now when we have a model, we need to load the test data we’ve created before. For this, select Supplied test set and click the button Set.
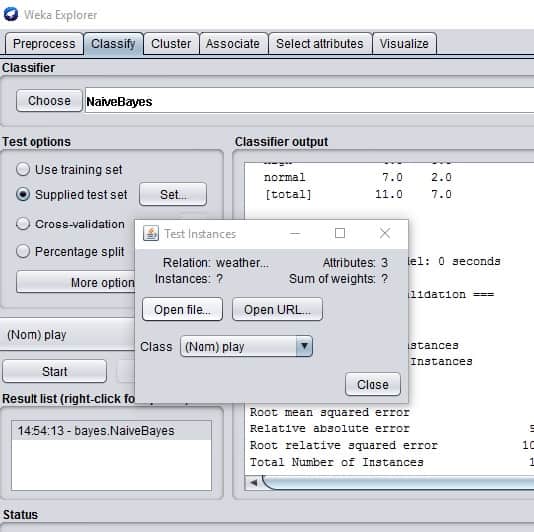
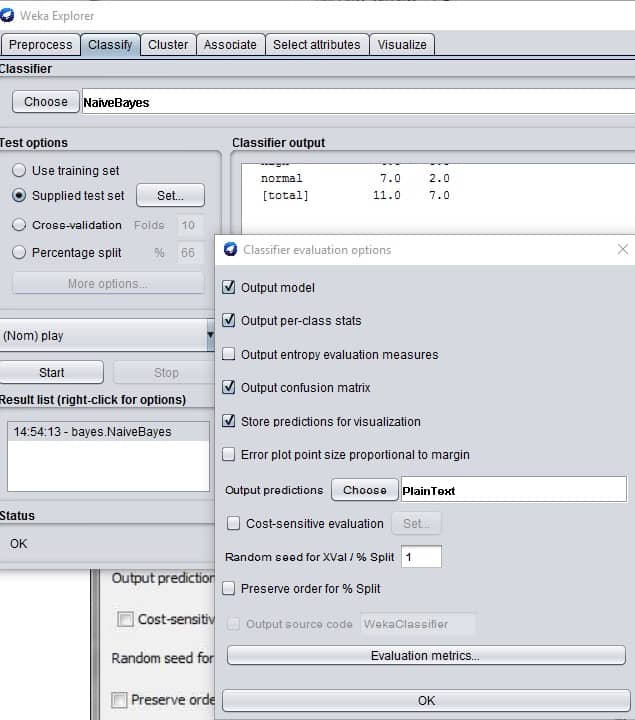
Click More Options wherein new window choose PlainText from Output predictions as follows:
Then click the left mouse button on a recently created model on the result list and select Re-evaluate model on the current test set.
And you should see the prediction for your given data cool and hot like this:
=== Predictions on user test set ===
    inst#     actual  predicted error prediction
        1        1:?      1:yes       0.531
As you can see, it has been predicted as yes, with an error of 53.1%. In the previous analytical example, we’ve got a 50% error on prediction.