Using VMLAB as virtual oscilloscope
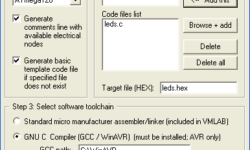
VMLAB is one of the well-known simulators. This is a software simulator of AVR and ST62 microcontrollers. The simulation is far away from real-time, but All timings are tied to real-world values. VMLAB is designed to work as a project. This is a special language (script like), where the circuit is described – where are connections between hardware and microcontroller defined. You may find few prebuilt examples in folders C:\VMLAB\AVR_demo and C:\VMLAB\ WinAVRdemo (If your installation is in C:\VMLAB\ folder). VMLAB is rich in its hardware support: Resistor, Grounded capacitor, Interactive switch/key, LED, Pulsed voltage source, Sine wave voltage source, Slider dependent voltage source (interactive), Non-return-to-zero (NRZ) generator (interactive), Operational amplifier, Comparator, 2 inputs NAND gate, 8 bits D to A converter, RS232 based TTY (interactive), LCD module, I2C monitor (interactive), Interactive keypad 4×4 Multiprocess-dedicated: External Input, External Output. So you can do a wide range of simulations. VMLAB also has a powerful scope where you can watch voltages on pins or even some internal microcontroller resistor values like ACO, TIMOVF signals. Let’s make simple project using VMLAB tool. Start VMLAB And create new project by selecting Project-New. Select project properties like project location, c file name, microcontroller type, software…

Continue reading

Frequency response of discrete system

In the previous post, we discussed the impulse response. Impulse response h(n) is a digital system response in the time domain. But there is another characterization of the discrete system – frequency response H(ejω). Frequency response can be calculated form impulse response by formula: This means frequency response is the systems transfer coefficient to every frequency value. Frequency response is a complex function. So this can be evaluated as:

Continue reading

Digital system equation

Back to the DSP thread. Let’s talk about the digital system equation. Every digital system can be described using this equation. The output of the digital filter generally consists of previous inputs and previous outputs. y(n-k) is considered as previous outputs; x(n-p) – previous inputs; ak and b­p – coefficients; This equation is convenient to define the discrete systems and extract various characteristics. Number N defines a discrete filter tap (Tap – A FIR “tap” is simply a coefficient/delay pair). Lets say we have digital filter made of one tap. y(n)=a·y(n-1)+b·x(n) First we calculate filter response function – h(n): Response function is calculated from system reaction to discrete impulse ´(n). So assume that x(n)= ´(n) and y(n)=h(n). Initial conditions: y(-1)=h(-1)=0. Then: h(n)=0 when n<0; h(0)=a·h(-1)+b·´(n)=b; h(1)=a·h(0)+b·´(1)=ab; ……. h(n)= ban where n>0 Lets say we have a=0.7; b=1; Then we get discrete system characteristics: This equation in example describes IIR (Infinite Impulse Response) discrete systems because there is a feedback element a·y(n-1). There is another type of discrete filter – FIR (Finite Impulse Response) Finite response filter equation is much simpler: As you may notice from the equation – the IIR filter has an infinite number of response impulses while the…

Continue reading

AVR microcontroller interrupts using WINAVR

I can’t imagine a microcontroller without interruptions. Without interrupts, you would have to make loops to check if one or another event occurred. Polling has many disadvantages like programs have to make loops, which takes valuable microcontroller resources. These resources may be used for other data processing tasks. This is why the microcontroller comes with built-in interrupt support. Instead of checking events, the microcontroller can interrupt normal program flow and jump to interrupt the service subroutine. During an interrupt, the microcontroller stops the task at the current point, saves necessary information to stack, and gives resources to interrupt the subroutine. When interrupt subroutine finishes, and then normal program flow continues. In assembler your program would start with interrupt table: After the table goes the main program (RESET) and other interrupt subroutines where the program jumps after the interrupt occurs.

Continue reading

ADC on AVR using on chip comparator

Not all AVR microcontrollers come with built-in ADC. But there is a way of building one using an on-chip comparator and timer counter. The comparator compares voltages on +v (Ain0) and -v (Ain1) inputs. If the Ain0 pin’s voltage is greater than in Ain1, then the comparator ACO is set to ‘1’ otherwise, it is ‘0’. Bellow you see AVR comparator circuit. The working of this ADC is as follows. First, PB0 is set to ‘0’ to discharge the capacitor. Then PB0 is programmed as input with no pull-ups, and Timer is started to count.

Continue reading

Understanding Timing diagrams of digital systems

Timing diagrams are the main key in understanding digital systems. Timing diagrams explain digital circuitry functioning during time flow. Timing diagrams help to understand how digital circuits or sub-circuits should work or fit into a larger circuit system. So learning how to read Timing diagrams may increase your work with digital systems and integrate them. Bellow is a list o most commonly used timing diagram fragments: Low level to supply voltage:

Continue reading

Control motor PWM schematic

In general, there are two ways to control DC motor speed: by varying supply voltage and pulse width modulation (PWM). The first control method is not convenient, especially in digital systems. It requires analog circuitry, and so on. The second motor speed control method is very convenient for digital systems because all control is made using only digital signals. As you already know, PWM (Pulse Width Modulation) is all about switching speed and pulse width (duty cycle). Duty cycle is the ratio of signal time ON/T. T is the period of the signal. In the above diagram, you see two signals. The first duty cycle is about t1/T=1/3, and another’s duty cycle would be about t2/T=2/3. And notice the period of signals are the same.

Continue reading

Programming AVR fuse bits – oscillator settings

I guess many of you were confused when programming AVR fuse bits. I get many newbie questions like “I programmed Atmega8, but it doesn’t work”. Then my standard answer is: “Did you touch configuration bits?” and if yes, then I am almost 90% sure that he did it wrong. Most of them understand wrongly that programmed fuse bit in configuration should be left unchecked and opposite. Let’s take a look at widely used programming software – PonyProg. First thing you do before programming the chip is set configuration bits (Atmega8 in the picture): The first attention should be paid to clock sources. Four bits are controlling Atmega8 clock sources: CKSEL0, CKSEL1, CKSEL2, CKSEL3.

Continue reading

Connect LCD to Atmega using 3 wires

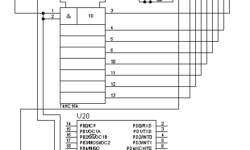
After I implemented interfacing LCD to ATmega8 using 2 wires https://scienceprog.com/interfacing-lcd-to-atmega-using-two-wires/ I decided to make another example but with 3 wires. Using 3 wires makes control much simpler as it is easier to control data flow to shift register. Here I used the same super cheap 74HC164 serial in parallel out register. LCD to shift register is connected in 8-bit mode. LCD strobe pin E is controlled with an Atmega PC2 pin. The register is clocked with PC1, and data is transferred with a PC0 pin. Notice that I used the same data line (PC0) to control the LCD RS pin. RS pin is controlled in this way: after 8 bits are sent to shift register, enable data line by setting ‘1’ (PC0) without clocking and after this LCD E pin is strobed. For more details, take a look at my source code at the end of the article. If there is any questions, don hesitate to ask. Source code:3 Wire LCD interface to ATMEGA

Continue reading