In the previous post, we just run a single task. Running RTOS with a single task has no meaning at all. This can be quickly done with a conventional program. But what if we need to have more separate functions. To execute them at exact timing would require a separate timer or interrupt. But microcontroller cannot guarantee an interruption for every task. This way, it is hard to make code modular, and testing can be painful. Using RTOS solves this kind of problem. It allows programming each task as an endless loop. Kernel scheduler takes care of assuring each task gets its chunk of processing time. Additionally, it does bearing the priority systems – more critical tasks are executed before less important ones.
Let us go further with our example code and add more tasks to our FreeRTOS engine. We already have an LED flashing task that toggles LED every second. Additionally, we are going to create another task that checks the button state. Also, we are going to send some information to the LCD. As always, let’s take care of drivers for all of them.
Writing driver to read button state
First of all, create button.c and button.h files and place them in the Drivers folder. We have one button connected to Atmega128 pin B5. It is connected to the ground, so to read it, we need to set the port pin as input and enable an internal pull-up resistor. For this we write simple vButtonInit() function:
void vButtonInit(void)
{
    // Set SWITCH_IP as input pin
    DDR_SWITCH_IP &= ~(1<<BIT_SWITCH_IP);
    // Enable pull-up on SWITCH_IP
    PORT_SWITCH_IP |= (1<<BIT_SWITCH_IP);
}
To check if the button is pressed we write another function. It returns pdTRUE if the button was pressed and pdFALSE if not:
char xButtonGetStatus(void)
{
            // See if switch is pressed
        if((PIN_SWITCH_IP&(1<<BIT_SWITCH_IP)) == 0)
        {
           return pdTRUE;
        }
        else
        {
           return pdFALSE;
        }
}
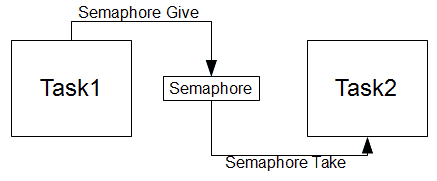
Having a driver ready, we can implement a task function. But the question is, what to do if the button was pressed? We want our tasks to be as independent as possible. FreeRTOS has special means for this – semaphores. Semaphore is a queue with length 1 with data size 0; it simply stores binary data (like a flag). IT is handy for task synchronization.
We are going to use a binary semaphore that will be set when the button is pressed. Semaphores must be accessible by other tasks in the application, so it needs to be a global variable. As our task functions are located in a separate source file, we need to make it external. To be able to use semaphores we have to include semphr.h file in our project. Then we create a semaphore handler:
xSemaphoreHandlexButtonSemaphore=NULL;
I have also created additional freertosm128.h file where I declared an xButtonSepmaphore variable as external.
Now we can create our button check task in mytasks.c:
void vButtonCheckTask( void *pvParameters )
{
portTickType xLastWakeTime;
const portTickType xFrequency = 20;
xLastWakeTime=xTaskGetTickCount();
xSemaphoreTake(xButtonSemaphore, (portTickType)0);
vButtonInit();
    for (;;)
    {
    if (xButtonGetStatus()==pdTRUE)
        {
            xSemaphoreGive(xButtonSemaphore);
        }
    vTaskDelayUntil(&xLastWakeTime,xFrequency);
    }
}
We will check the button state every 20ms, so we use the vTaskDelayUntil() function with frequency=20. As you can see, if the task detects button press, it simply sets semaphore with xSemaphoreGive() function.
Now we can create our task in the main program. First of all, we need to generate a semaphore before use with function:
vSemaphoreCreateBinary(xButtonSemaphore);
then if a semaphore was successfully created, we could create a button check task.
if(xButtonSemaphore!=NULL)
{
    //successfully created
    xTaskCreate( vButtonCheckTask, ( signed char * ) "Button", configMINIMAL_STACK_SIZE, NULL, mainButton_TASK_PRIORITY, NULL );
}
Driving LCD
Let’s connect the LCD screen to our Atmega128 board and create a simple output button state using semaphores. Additionally, we are going to output the number of tasks running.
We are going to use our LCD library to drive LCD in 4-bit mode. LCD is connected to AVR PORT E as follows:
We need to make correct pin assignments in lcd.lib.h file:
#defineLCD_RS2//define MCU pin connected to LCD RS
#defineLCD_RW2//define MCU pin connected to LCD R/W
#defineLCD_E3//define MCU pin connected to LCD E
#defineLCD_D00//define MCU pin connected to LCD D0
#defineLCD_D11//define MCU pin connected to LCD D1
#defineLCD_D22//define MCU pin connected to LCD D1
#defineLCD_D33//define MCU pin connected to LCD D2
#defineLCD_D44//define MCU pin connected to LCD D3
#defineLCD_D55//define MCU pin connected to LCD D4
#defineLCD_D66//define MCU pin connected to LCD D5
#defineLCD_D77//define MCU pin connected to LCD D6
#defineLDPPORTE//define MCU port connected to LCD data pins
#defineLCPPORTE//define MCU port connected to LCD control pins
#defineLDDRDDRE//define MCU direction register for port connected to LCD data pins
#defineLCDRDDRE//define MCU direction register for port connected to LCD control pins
Let’s create an LCD update task.
void vLCDUpdateTask( void *pvParameters )
{
static const uint8_t welcomeln1[] PROGMEM="FreeRTOS DEMO";
static const uint8_t buttonln1[] PROGMEM="BT:";
static const uint8_t tasksln1[] PROGMEM="TSKS:";
portTickType xLastWakeTime;
const portTickType xFrequency = 500;
xLastWakeTime=xTaskGetTickCount();
unsigned portBASE_TYPE uxTasks;
LCDinit();
LCDclr();
LCDcursorOFF();
CopyStringtoLCD(welcomeln1, 0, 0);
CopyStringtoLCD(buttonln1, 0, 1);
CopyStringtoLCD(tasksln1, 7, 1);


    for (;;)
    {
        uxTasks=uxTaskGetNumberOfTasks();
        LCDGotoXY(13,1);
        //works only up to 9 tasks
        LCDsendChar(uxTasks+48);
        if (xButtonSemaphore != NULL)
        {
            LCDGotoXY(3,1);
            //poll
            if (xSemaphoreTake(xButtonSemaphore, (portTickType)0)==pdTRUE)
            {
                LCDsendChar('1');
            }
            else
            {
                LCDsendChar('0');
            }
        }
    vTaskDelayUntil(&xLastWakeTime,xFrequency);
    }
}
To save RAM space, all static LCD strings are stored in FLASH memory. Before tasks endless loop, we need to initialize the LCD screen and send a static text to LCD as it won’t change. Updating LCD isn’t critical, so we are going to call the task every 500ms. After initial settings are done, we enter endless for(;;) loop where we update the number of tasks and send it to LCD, labeled as “TSKS.” Secondly, we are pooling for xButtonSemaphore. If vButtonCheckTask reads button press and sets semaphore vLCDUpdateTask takes it and updates LCD “BT:” status by setting the value to 1 (otherwise it shows 0).
Finally, we need to create a vLCDUpdateTask task so the scheduler could add it to its management queue:
xTaskCreate( vLCDUpdateTask, ( signed char * ) "LCD", configMINIMAL_STACK_SIZE, NULL, mainLCD_TASK_PRIORITY, NULL );
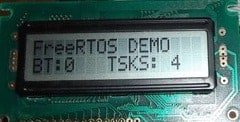
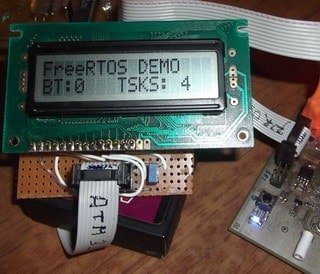
As LCD task isn’t critical, it is set to idle priority. Now we can run the program and see results:
when the button isn’t pressed
and when pressed
vLCDUpdateTask also reads the number of tasks created. We can see the number “4,” which means that we are running four tasks. Three of them are our tasks (vLEdFlashTask, vButtonUpdateTask, vLCDUpdateTask) and idle task created when vTaskStartScheduler() is called.
So far, we can run several independent tasks and have simple communications with semaphores. In this example, we are sending button status one way. LCD task takes a semaphore, which is equal to reset it. As you may know, semaphores also are great at sharing resources, where tasks may access hardware resources only when the semaphore is released. Also, there are more ways to communicate between tasks like queues and mutexes. These will be covered in future topics. [download M128RTOS]


Comments and corrections are welcome!
Using Atmel Studio 7, I had to change “SIG_OUTPUT_COMPARE1A” in port.c to “TIMER1_COMPA_vect”. After that, it’s worked great. Thanks.
nice tut but which avr is used
It’s classic ATmega128. See previous post for more details on board used.
hi,
i want to know maximum number of task could run and stack size for atmega128..
thanks,
very nice tutorial to start with RTOS…well explained…
Hello, First thanks for such a good tutorial and my question is that how to write ISR in free rtos ,means how we can use interrupts(like external,Uart tx rx interrupts) in free rtos?