


There is a Raspberry Pi 3 out there, which is much faster than versions 1 and 2. While latest two are faster than first model, I thought it would be great to give some purpose to first Raspberry Pi model B. We share several computers around the house and sometimes need simple file storage solution to make backups, share and store. Raspberry Pi model B is sufficient for simple Network Attached Storage (NAS) solution. Such network automation setup doesn’t need much processing power to manage the drive. And there is also an option to have a torrent client running 24/7. Another benefit of using Raspberry Pi is low power.

Let’s go through all steps on how to set up Network Attached Storage on this Raspberry Pi. You can go with several different solutions for setting up NAS. You could go with cloud solution like Owncloud, which is similar to Dropbox. This might be convenient in many ways, but I would like to have the ability to use the drive as portable media when needed. In that case, I am going to stick with SAMBA server.
As usual, we will set up things via SSH in the command line. And the first thing you should do is to update Raspbian with following commands:
sudo apt-get update
sudo apt-get upgrade
The drive I am using is formatted as NTFS, so we need to install support for this file system:
sudo apt-get install ntfs-3g
Mounting drive
After the command is successfully finished, attach the drive to Raspberry Pi USB port. For now, I am using 16GB flash drive. Wait until drive LED blinks when recognized, and enter following command to see if the drive is identified:
sudo fdisk -l
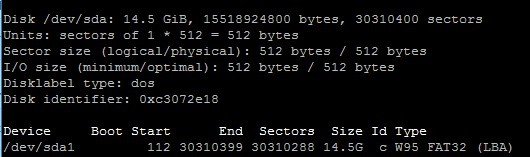
We can see that our drive was successfully recognized as /dev/sda1 device as FAT32.
Now we need to create a directory in Raspberry Pi where the drive can be mounted. You can create mount directory anywhere you want, but it is recommended to do it in /mnt directory. So we enter command:
sudo mkdir /mnt/16GBdrive
We can mount the drive with the command:
sudo mount /dev/sda1 /mnt/16GBdrive
Then test its contents
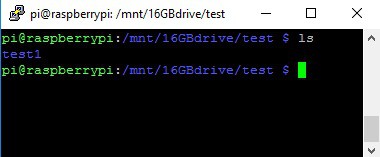
This manual mounting operation stays active until next reboot. If you don’t want to mount drive every time after powering on automatically when Raspberry Pi boots up. For this we need to edit fstab file:
sudo nano /etc/fstab
And add following line
/dev/sda1 /mnt/16GBdrive auto nofail,uid=pi,gid=pi,noatime 0 0
To the bottom of file as follows:
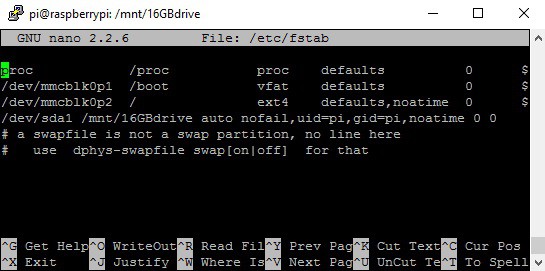
Save the file and reboot Raspberry Pi to see if settings are working. After it boots up, you should access drive contents without any additional action. For instance you can try creating new directory:
sudo mkdir /nmt/16GBdrive/mydir
Set up Samba on Raspberry Pi
We have set up the drive, and we can proceed to Samba installation. First of all lets install Samba package with following command:
sudo apt-get install samba samba-common-bin
After it installs, next step is to edit configuration file smb.conf. It is an excellent practice to make backups of important files before messing around. We can easily do this with cp command as follows:
sudo cp /etc/samba/smb.conf /etc/samba/smb.conf.bak
Now we can start editing configuration file by opening it with nano editor:
sudo nano /etc/samba/smb.conf
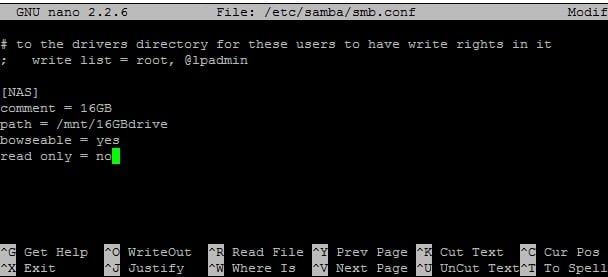
In configuration file we need to add following to the end
[NAS]
comment = 16GB
path = /nmt/16GBdrive
browseable = yes
read only = no
Save the configuration file and restart samba server with command:
sudo /etc/init.d/samba restart
and finally connect user pi to samba:
sudo smbpasswd -a pi
Of course, you can create your own use for this.
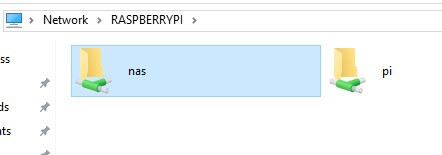
Accessing NAS server from Windows
Accessing NAS server from windows is easy. All you need is to:
- go to network in file explorer;
- you will see that RASPBERRYPI device appeared;
- double click on folder;
- log in with pi user.
This is it; you can create, download, upload, and delete files on Raspberry Pi Network attached storage.
Let’s do some initial transfer speed tests. Raspberry Pi is connected via WiFi to network:
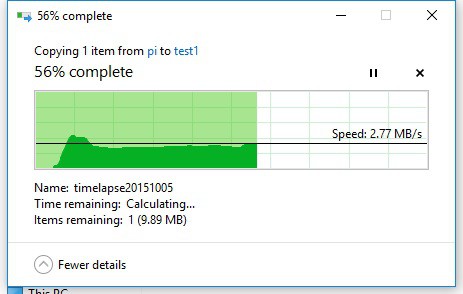
As you can see, download and upload speeds are about 2.7MB/s.
Let’s do some tests with LAN connection
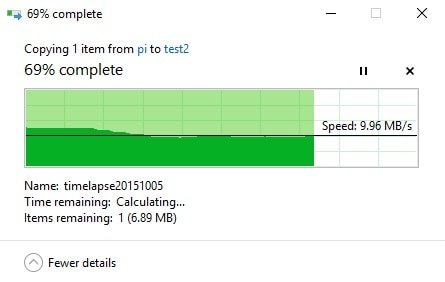
As you can see, with LAN connection, file upload and download speeds are up to 10MB/s. I think this is not too bad for basic usage.
Final advice. If you do not own spare Raspberry Pi, don’t waste money on building NAS – better get specialized hardware which is cheaper and is a faster option. Conversely, if you are looking for flexibility and low power option, Raspberry Pi-based NAS could be a great option, especially if you have spare board lying around. If you need more storage than USB stick, get portable HDD. Just be sure to match power supply, as USB port can be too weak to supply enough current.
It would be interesting to see the speeds on Raspberry Pi 3 with built in WiFi.