
Renault Scenic II fan fails quite often. In some cases, you may notice that not all speeds selected from the dashboard works or works occasionally. But most often fan stops working at all. Of course, the first step to check fuses. If fuses seem to be OK, then the only way to look is at the fan speed controller (sometimes called fan resistor).
The easiest and most expensive way is to call service and leave them to do repairs. But if you have some engineering blood, you can do it yourself by spending less than an hour of your time and probably only a couple of bucks.
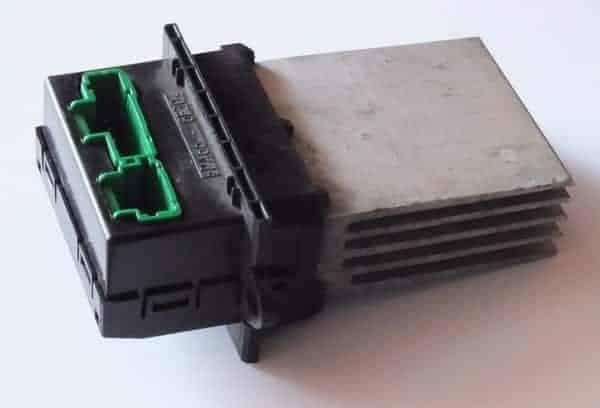
How to remove Renault Scenic II fan controller block?
Suppose you decided to repair yourself and then prepare to dig pretty deep into your car’s panel. How to reach the speed controller, you can follow this video:
How to test if fan controller block failed?
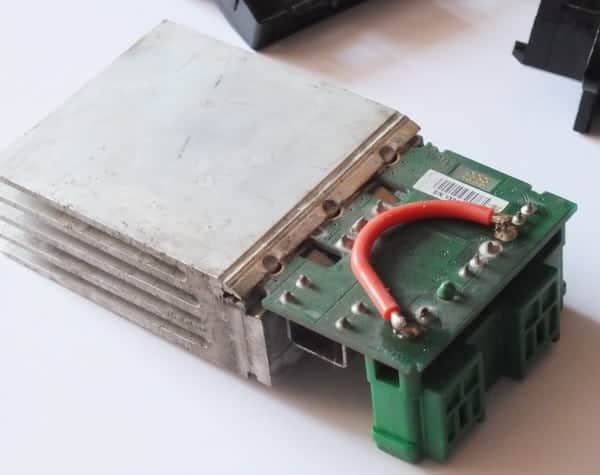
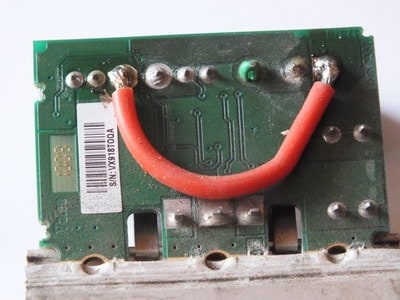
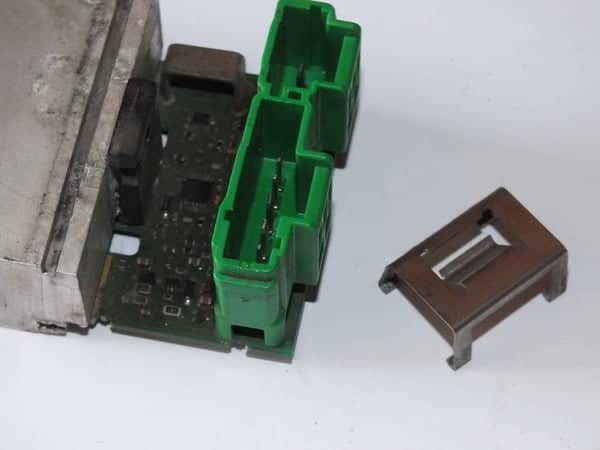
Once you have a blower resistor in your hands, the first thing I would recommend to do is make sure that this is the source of the problem. Who knows, there might be other reasons why the fan does not work. There might be a fan motor failure, and so on. To do so, remove the fan resistor plastic cover and then short two leads with thicker wire, as in the picture below.
Once you shorted those two pins, assemble the resistor and connect to your car – don’t assemble the panel yet. Turn the ignition, and your fan should blow at maximum speed always. If you get this result, you can be sure that the fan regulator (resistor) is faulty and can proceed further.
You can replace the regulator with a new one, which costs from $30 to $100, and you still would save lots of cash compared to what service would charge you. But if you have time and patience, you can try to save even more. You can replace the main transistor in the circuit, which is probably blown. Transistor costs about $2, and if you succeed, then your fix would cost practically nothing.
How to replace the transistor In the fan controller block?
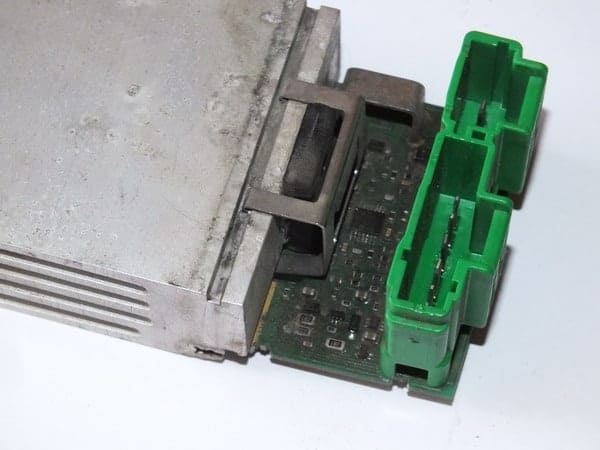
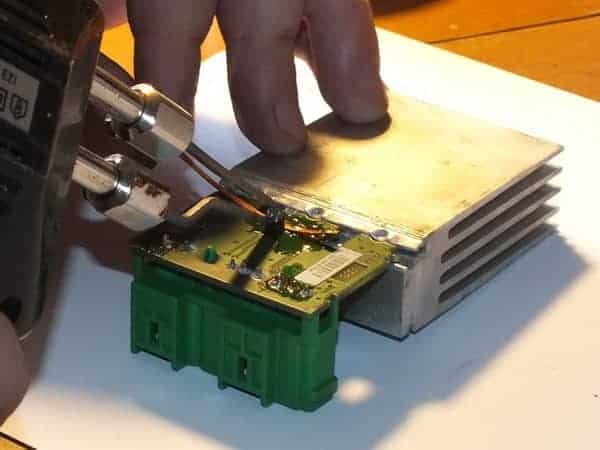
First of all, you should remove the old transistor, which is clipped to the radiator. Remove the clip and desolder it with a desoldering wick (don’t use solder sucker as they may create electrostatic discharge and destroy MOSFET). Use powerful soldering iron as there is quite some thermal mass, especially on the middle transistor leg. I have used 100W soldering iron.

When you desolder transistor, you can try to test it if it’s faulty. In most cases, you can use a multimeter. Multimeter should have a diode test function, and the minimum voltage for the diode test should be 3.3V. Follow the test procedure here.
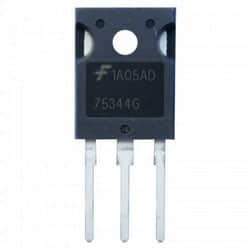
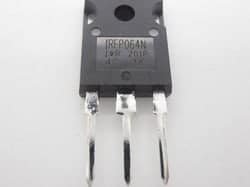
THE Desoldered MOSFET transistor will most likely be HUF75344G3, a power MOSFET with main characteristics: 55V, 75A, and 8mΩ drain-source resistance when open. It comes in a TO-247 package. You may replace it with the same transistor or look for something similar. Voltage and current can be higher. Resistance can be the same or smaller. For instance, IRFP064N is a great replacement that comes with the same max voltage 55V, same resistance of 8mΩ but a higher drain current 110A, which gives an even safer margin.
Before placing the transistor to place, apply thermal paste where it touches the aluminum radiator when soldering is sure to prevent transistors from electrostatic discharges. Ideally, you should use a grounded electrostatic wristband and grounded electrostatic mat. If you don’t have any of these, try not to touch transistor leads while handling.
After the part is soldered and fixed, assemble the plastic cover and test it in your car if it works. If the fan works as expected, then assemble all panel parts and enjoy the result.