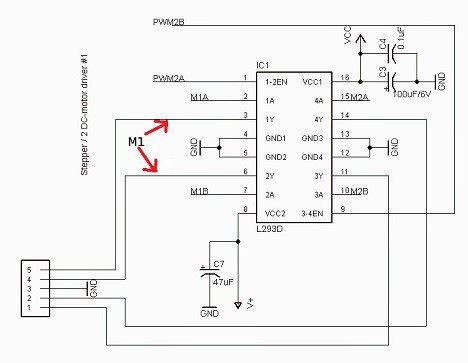
This is a continuation of the previous post where we have tried to run a servo using an Arduino motor shield. This was a simple task to do with the Arduino Servo library. Today we will push things a bit forward and drive the DC motor using the same motor shield. This motor shield can run small DC motors that require less than 0.6A of current and operating voltage is less than 25V. In my drawer, I found a small 12V motor that will fit this demo. Before we begin programming, we need to connect the motor to the Board. We are going to use the M1 connector.:
Since the motor requires a 12V power supply, we are going to use an external power supply. It can be connected to the External power screw terminal. Be sure to remove the jumper as well.
There is NO reverse polarity protection, so be sure you connect it right; otherwise, things can get hot or damaged. If you get LED shining, you are done, and it is safe to connect the USB cable to Arduino.
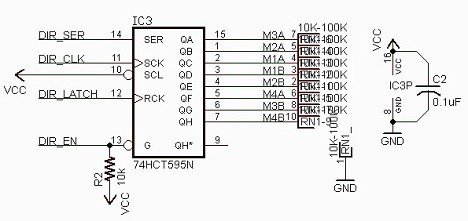
Driving DC and stepper motor become more complicated because there is a serial-in parallel-out shift register 74hct595n used for setting enable signals on L293D:


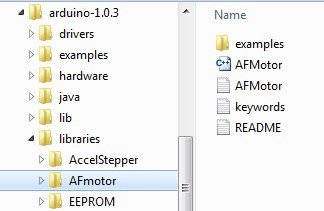
We can try running using standard Arduino commands. But why bother if there is already a great library to drive motors using a few commands. First of all, download AFMotor library from GitHub. Unpack it and copy the AFmotor folder to Arduino->libraries folder so that AFmotor.cpp and AFmotor.h files were in the top level of the folder just like this:

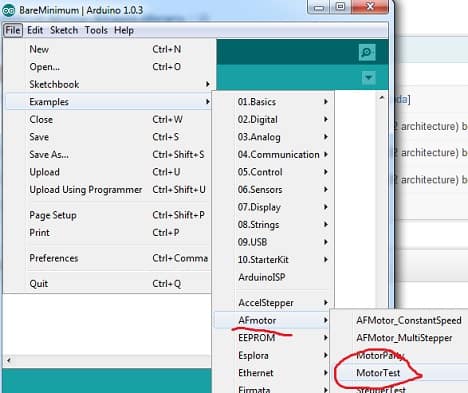
After your library is in place, restart Arduino IDE and then go to File->Examples->AFmotor->MotorTest. And you should be loaded with a simple example program that can be used to test DC motor.

Here is the test program. I just removed serial messages for a more compact view:
#include <AFMotor.h>
AF_DCMotor motor(1);
void setup() {
  // turn on motor
  motor.setSpeed(200);
  motor.run(RELEASE);
}
void loop() {
  uint8_t i;
  motor.run(FORWARD);
  for (i=0; i<255; i++) {
    motor.setSpeed(i);
    delay(50);
 }
  for (i=255; i!=0; i--) {
    motor.setSpeed(i);
    delay(10);
 }
  motor.run(BACKWARD);
  for (i=0; i<255; i++) {
    motor.setSpeed(i);
    delay(10);
 }
  for (i=255; i!=0; i--) {
    motor.setSpeed(i);
    delay(50);
 }
  motor.run(RELEASE);
  delay(1000);
}
As you can see Arduino program includes our new library with the command
#include <AFMotor.h>
Then we make sure to indicate where the motor is connected. Since we connected the motor to the M1 screw terminal, we create a motor object as follows:
AF_DCMotor motor(1);
In setup, we show initial motor speed in the range 0 – 255, where 0 means motor is stopped, and 255 is maxed speed. As motor speed is controlled with PWM, then speed determines the PWM duty cycle. Then follows run() command with one if three parameters:
- RELEASE – the motor is stopped;
- FORWARD – the motor is driven in one direction;
- BACKWARD – motor spins in other direction.
Another part of the program is self-explanatory. It simply drives backward and forwards, gradually speeding and slowing. As you can see, driving DC motors is also an easy task. Arduino motor shield allows driving up to four DC motors simultaneously in both directions. By tweaking the AFmotor library a bit, you can practically drive 8 DC motors single direction where one motor pin is connected to the control signal and another to the ground.
There is one thing left to try – the stepper motor. They are more complex, but once you get them running, you can perform the precise rotation. Next time we will give it a try.


Thanks for this great tutorial. I got my light following robot working now.