
Do you wish to have a thin, accurate, and durable Force Sensitive Resistor (FSR) to help you to sense the surface pressure? Well, would you want to spend over $50 for just an adequate quality FSR, while you can DIY it with less than $20 here?

First of all, you have to prepare the require tools and components: Tools
- Knife/razor
- Hot glue gun
- Soldering iron
- Wirecutter
Components
- Hot glue
- Solder
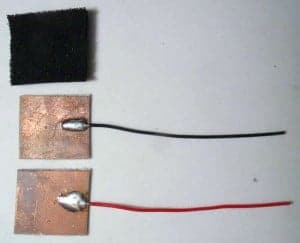
- One-sided copper PCB
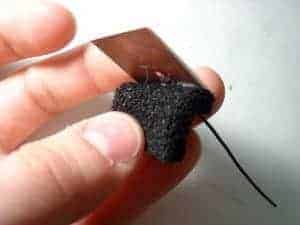
- Conductive foam
- Wire
Note: You must pay attention to the conductive foam, as not all of the conductive foam is created equally (Some of the foam bounces back into its original shape faster than others). It has been known that the PIC foam will respond more quickly than the ATmega foam, which will take a second to release. Follow the step-by-step guide here:
Step 1: Use the knife/razor to score your PCB into two plates; it has to be about one-square-inch squares at least. Cut the foam into the same size as the plate and solder one wire to each leaf.
Step 2: Glue the three pieces together in this sequence: plate – foam – plate. You just need to glue the top and bottom of both plates to the foam.
Step 3: Test it out with a multimeter, and measure the resistance across your FSR (You will get about 200 kiloohms at rest and 9 kiloohms when it’s nearly depressing).