After the release of AVRStudio4, there is possible to integrate the AVR-GCC compiler into it. As you know, AVRstudio is a powerful tool that has an assembler compiler- debugger, programmer, etc. Integration of AVR-GCC makes this tool a much more powerful and more complete playground for developers. A plugin built-in AVRStudio detects the AVR-GCC compiler by itself, so you don’t have to bother how to tie them together. And here we go – full set of good tools comparable to commercial. The convenient user interface, automatic makefile generation, visual debugging by watching processors register, or even you can flash the chip.
How to set up the working environment? This is simple. First of all, you have to download WinAVR20060421 and install it on your machine. Then download AVRStudio Version 4.12 and service pack 3 and install them on your PC.
And… that’s it. You are set. Now open AVR Studio and select menu->Project Wizard->New project.

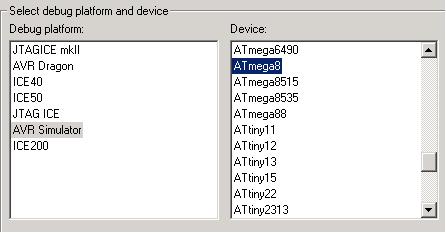
In a Welcome AvrStudio4 Screen, select Project Type AVR GCC, enter a project name, select Create Initial file if you want to initial c file to be created. Select Create Folder to put project files in a separate folder. Enter an initial c file name. And browse to the location where you want your project to be saved. Press Next and select debugging platform – Usually AVR simulator for computer simulation and select your device – for instance, Atmega8.

Press finish to start with your project.
Write a program in you code window, for instance:

Then go to Project menu->Configuration->General tab. There you can configure your makefile parameters. Usually, they are set by default but let’s say you want to use an external makefile instead of automatically generated, and then you have to select it in these settings.

So, then save and Press Build Active Configuration.
Debugging can be done in same way as it is done with AVR assembler.
More help can be found in AVRStudio Help->AVR GCC Plug-in Help

