A programmer adapter is one of the first things to get when starting with microcontrollers. Luckily, it is not hard to build a working programmer almost for any microcontroller, as there are tons of open-source projects.
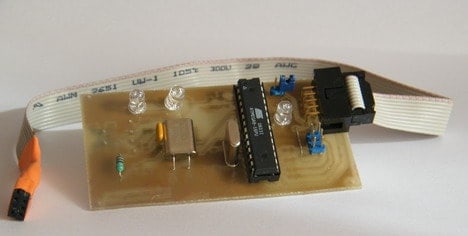
I decided to make my own stk500 compatible programmer, which is taken from tuxgraphics.com. I did not look for the same parts as in the original schematics but used what is on the desk. As a result, I got a mix of through-hole and SMD PCB, which does the job.

Short info about STK500 V2 programmer
This STK500 V2 adapter is a clone of the original AVR STK500 programmer. It works on all leading platforms, including Windows, Linux, BSD, and macOS X. This is mainly because USB to serial converter – FT232RL chip has full driver support. The main reason to build it is that the programmer works in AVRstudio, where microcontrollers can be programmed fluently from the same IDE. Besides, it works fine with AVRDude – which would be the primary application for Linux users. This clone gained quite significant popularity so that you can find many variations – mostly different PCB versions. Therefore, mine is yet another PCB.
STK500 programmer hardware
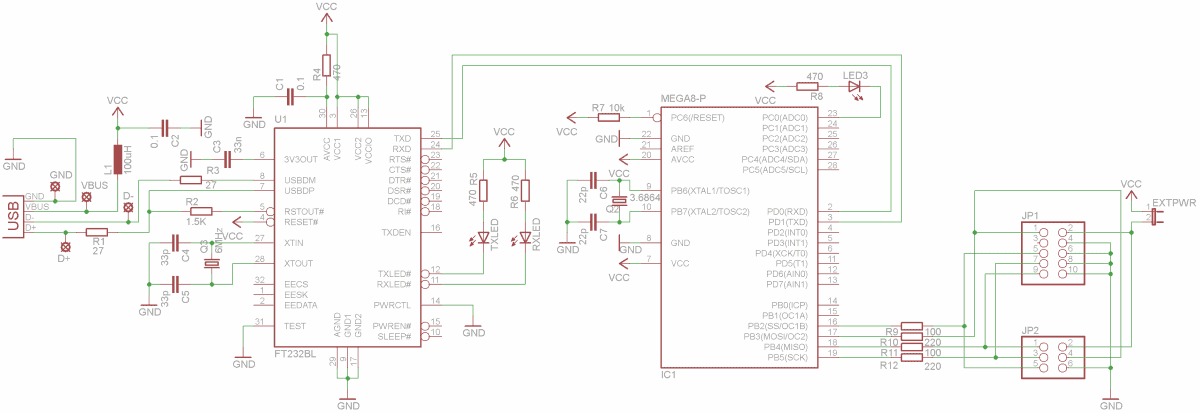
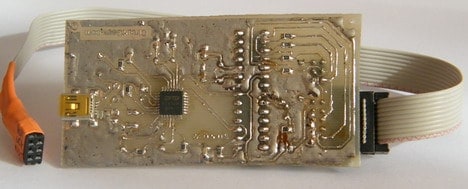
As I mentioned, this is a quick build from parts found on the shelf; this isn’t the best PCB. Because it uses a mix of SMD and through-hole parts, anyway, it works as supposed, so no problem with that at all. Let’s get into some details. I found an FT232BL chip used in some earlier projects, so I decided to use it instead of the newer FT232RL. It is the pretty same chip but the older generation. Additionally, you need to use an external 6 MHz crystal and a couple more components. Drivers are still supported up to Win 7, so it can even be used actively.

Atmega8 is in a DIP package, which is easier to remove and program with another adapter – which can be a bit problem if building the first programmer. Ask friends to program chip or use a dirty parallel port programmer to flash it.

In this programmer, I used a USB mini-B SMD Connector that came to my hands. There are also solder holes left if you decide to solder a USB cable directly. The programmer has ten pin and six-pin programmer headers. I usually use a six-pin ISP header, so I made cable only for this one.
Flashing Atmega8
As I mentioned – you need to program ATmega8 first before use. The latest firmware for it can be found here. And don’t forget to set fuse bits correctly. FYI fuse bits in PopnyProg should be as follows:
Or pass them to AVRdude as follows:
Low byte: 0xEE;
High byte: 0xE9.
Running programmer on AVRStudio
When running programmer in AVRStudio, select STK500 platform and COM port to USB – serial converter assigned. In my case, it is COM5. After clicking Connect… it suggests upgrading programmer firmware – skip by pressing Cancel as the upgrade function won’t work for it. The next screen you’ll see is an STk500 programming dialog where you can select the device and program it.

Just a little note about ISP mode settings! If you are trying to flash a new AVR where the default 1MHz clock is running, you should select the proper ISP frequency as it has to be less than ¼ the target.

To flash 1MHz Atmega, you should go with 115.2 kHz, while 8MHz will do fine with 1.845 MHz.
Download project files: stk500usb


Why do you use the FT232BL with cristal? Can I use the ft232RL without cristal too?
I think you can. It has internal cristal already.