Atman AVR is an integrated c/C++ compiler IDE for Atmel AVR microcontrollers. AtmanAvr C development environment includes ProjectWizard, CodeWizard, Workspace, Output, Text editor, Binary editor, Debugger. The compiler itself is a GCC compiler for AVR. The only thing that makes it commercial is the integrated environment:
ProjectWizard – lets you customize a project through series dialogs, and then it generates initial code automatically;
CodeWizard – helps in programming routine tasks like creating new modules, adding functions navigating;
Advanced workspace where you can find File View, Class View, and I/O View, and many more.
If you would like to try this IDE, you may download AtmanAvr C IDE from the manufacturer’s site https://www.atmanecl.com.
Bellow is an Atman AVR kick start guide with some screenshots: Create new project File->New:
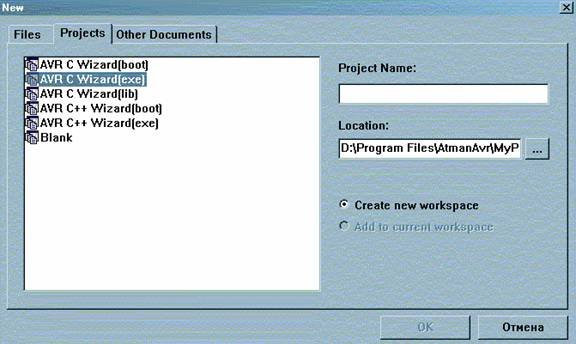
In the Project Name enter the name of your project. Also, select where your project will be located. From tab Projects select one type of projects:
- AVR C Wizard(boot) – Bootloader project using C;
- AVR C Wizard(exe) – standard C program – usually this is the choice for your projects;
- AVR C Wizard(lib) – wizard for library creation using C;
- AVR C++ Wizard(boot) – Bootloader project using C++;
- AVR C++ Wizard(exe) – standard C++ program;
- Blank – Empty projects without wizard;
Select AVR C Wizard(exe) and press OK. The next window opens. There you must select the Chip type, clock speed, and Watchdog timer with prescaller if needed.
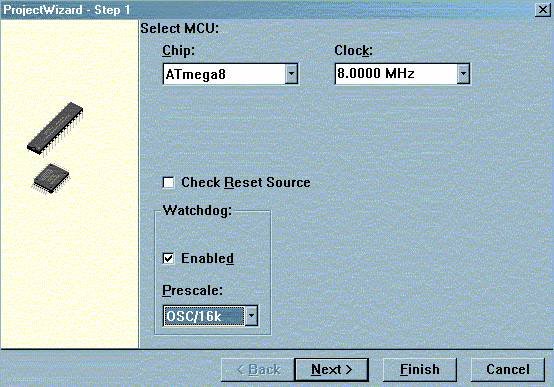
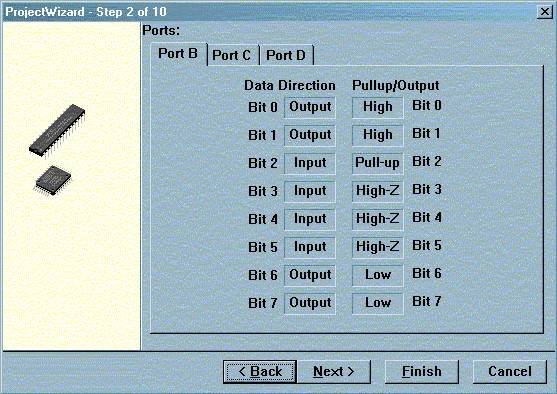
Let’s say we selected the Atmega8 chip and press Next. Ports settings window opens. There you may set ports pins as inputs or outputs and initial values of port registers. There is also the ability to select PullUp or leave High-Z for the pins:
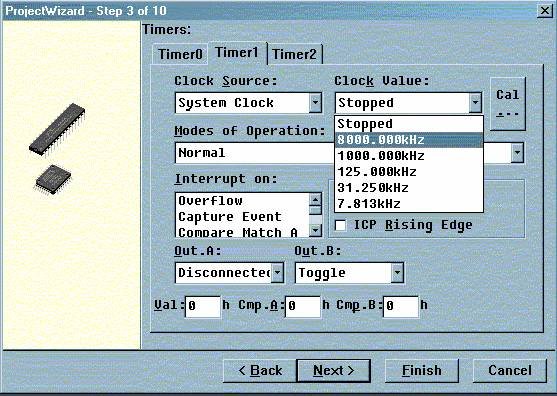
The next window is timer settings. Depending on the microcontroller model, there can be a different number of timers. There you can select all available properties for AVR timers like clock source, prescallers, interrupts, and so on!
The next setting is for external interrupts. There you can enable external interrupts and select the interrupt mode (falling edge, rising edge, or high or low value):
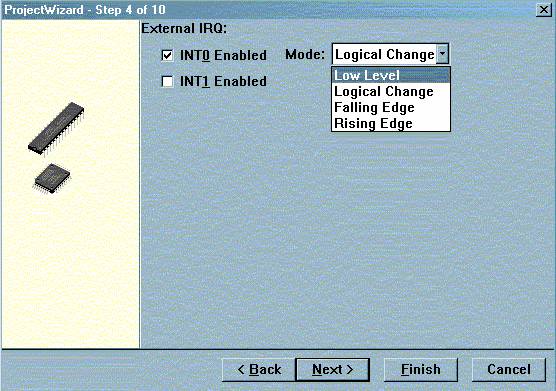
5th step of the wizard is ADC settings. There you can enable ADC on your AVR microcontroller, select features like Noise canceling interrupt or free-running modes! Set ADC clock and voltage reference:
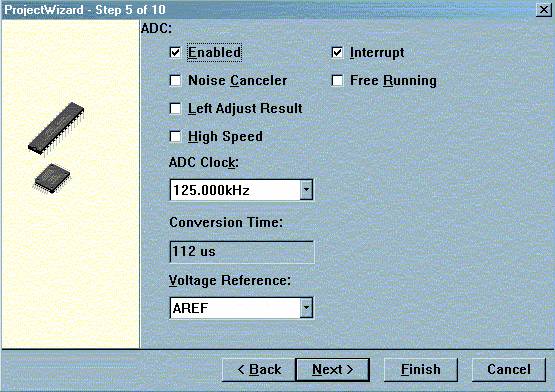
Next goes analog comparator settings. You may enable analog comparator and interrupt on the match and other features:
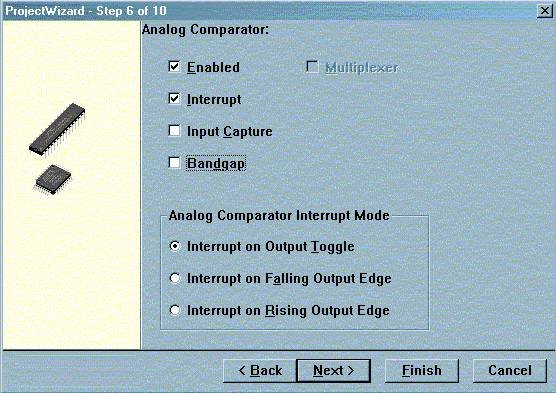
7th step of Atman AVR initial wizard is SPI settings. You may set interrupt, clock rate, working mode: slave or master, double speed, clock phase, and data order: first LSB or MSB:
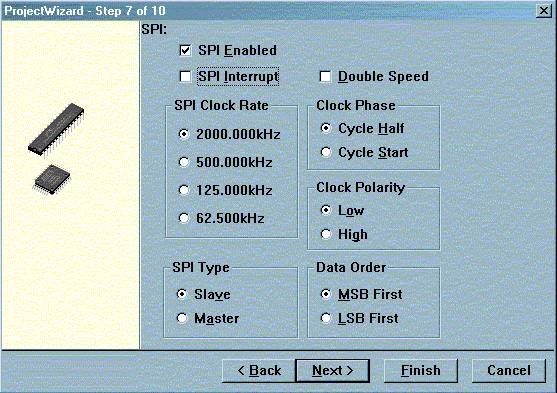
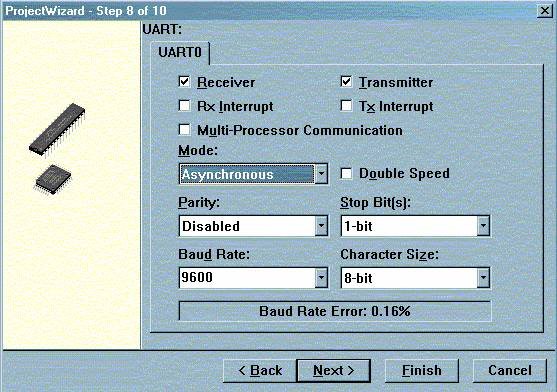
Next, go UART settings. There you may set settings for transmitter and receiver. You can select interrupt modes, synchronous or asynchronous operation, parity check, stops bits, Baud rate, and character size:
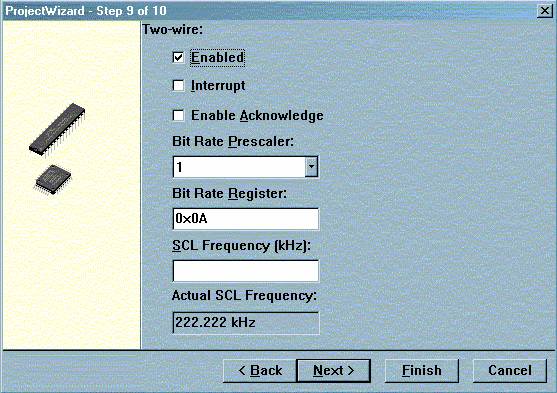
The next setting is I2C or TWI interface settings. Enable it if you are going to use it. There is also interrupt mode select, ACK generation select, Bit rate prescaller, bit rate register value, SCL frequency select:
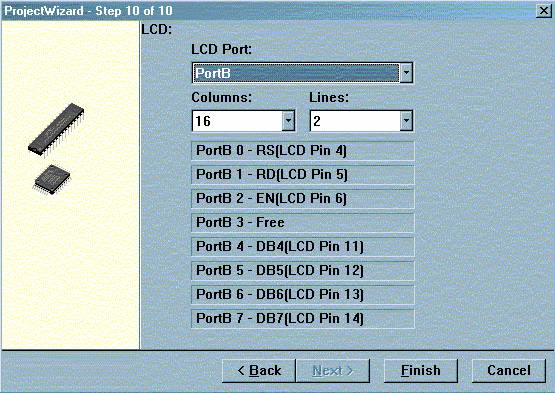
And the last step in the wizard is LCD. If your project is going to use LCD, then you can choose connection settings for it. When you select the LCD port, you can see how to connect LCD to AVR in order properly to use the built-in library.
You may come back to any step and correct any settings before you press Finish.
After you press Finish, the initial code is generated and files needed are added to the project:
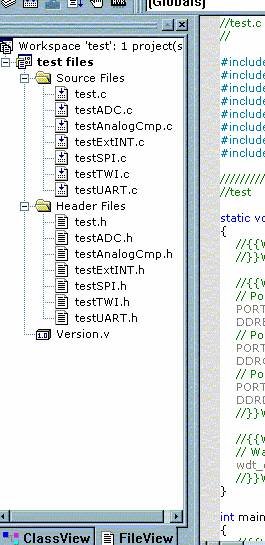
Depending on wizard settings, there might be files included for ADC support, TWI, SPI, interrupt. There is also some initial code in the main file. Just insert your needed code and compile by pressing Build->Build. If compilation is successful, then the project directory hex file will appear ready to burn into the microcontroller.


